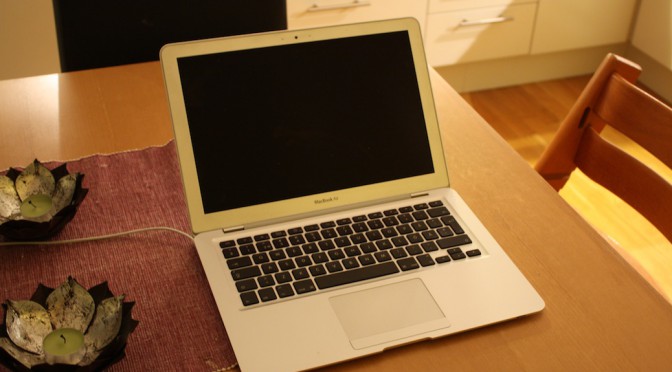

All of a sudden, while simply reading todays news one morning, my almost three year old MacBook Air (late 2008 edition) died. This is the story on how I dismantled it, cooked the logic board in the oven and brought it back to life.
(Update: Since this article was written I have repeated the process and adjusted the cooking time, please see the later articles which are linked at the end of this article.)
Background
I’ve heard about kernel panics before but never experienced one myself – until now. I didn’t take it so seriously at first, thinking it was just Apples way of a nicer blue-screen-of-death when telling me I had to turn off my computer. I didn’t have any choice but to do as told, only to discover a new kernel panic during the next boot. The second time turned out the same as the first, a gray screen with some dumped error text. Thinking third time’s the charm I rebooted once more only to find a lit light but a blacked out screen. I never got passed this point so later that day I handed in my MacBook Air to the nearest Apple Authorized Service Partner for a diagnostics.
A few days later I received a call from the technician, who diagnosed my MBA, telling me it had a “dead logic board”. Having no warranty, I was offered a repair (new logic board) at the cost of roughly 5400 SEK (~810 USD). The technician himself noted it was almost half the price of a new laptop and thus asked whether I wanted to proceed with the repair or simply pay the diagnostics fee and instead buy a new one. I did some Googling and came to the conclusion that indeed logic boards are expensive and it wouldn’t be much cheaper to do it myself either. However, during my Googling I stumbled across an article called Cooking the Books (or, Baking My MacBook Pro Logic Board). Apparently a lot of people have had problems with their 2008 MacBook Pro logic boards, with similar symptoms I was experiencing – and how did they fix them? They put them in the oven. I haven’t read anyone trying to bake/cook MacBook Air logic boards but I figured it wouldn’t be much of a difference.
Taking the MacBook Air apart
It was actually easier than I expected, taking the MBA apart. The first step, obviously, was to turn the laptop upside-down and remove the screws securing the bottom cover to the rest of the computer. Since the screws are different length and for easier putting-it-all-back-together I arranged the screws the same way the are mounted on the computer:

With the bottom cover removed, it was time to remove the battery. I unplugged the battery cable from the logic board (yellow marker) and removed the screws (red markers) and again arranged the screws to remember where the long one should go:


Next, I disconnected the external ports from the logic board and removed the three screws holding the hard drive in place – I did however not remove the hard drive as simply loosening it proved sufficient:

When the hard drive was loosened, I had to remove two tiny screws holding down a small metal bar under which was two connectors (show in blue in the picture below). I also unscrewed all screws holding down the cooling plate (red markers). The picture shows the computer with the screws removed as well as the L-shaped aluminum piece (which was fastened by the middle screw, pressing down on the CPU and GPU), they can be seen in the green box marking. The observant reader will note that the middle screw looks a bit strange in the picture, the reason is I had to drill it away since I accidentally destroyed the head so the screwdriver couldn’t get any grip (when putting it back together I took one of the corner (corner of the cooling plate) screws instead, they are shorter but it worked anyway).

I now removed the cooling plate, disconnected all remaining cables from the logic board and cautiously removed it from its position:


Baking the logic board
I started up the oven (in my case a hot air oven) and set it to approximately 190°C and used a kitchen thermometer to check the actual temperature continously.
Before putting it in the oven I needed to prepare the board and remove all plastic, having removed them from the top side ended up with this lot (laid out according to the logic board picture above):

I did the same for the bottom of the logic board (afterwards I believe removing the paper stickers was unnecessary):


As was done in the Cooking the Books article, I put some aluminum foil on the oven plate, so that any “problems” (like melted parts) would be clearly visible as well as created four “aluminum supports” (see the after-pictures below), to avoid resting the logic board directly on the (soon to be) hot oven plate. With the temperature showing 191°C it was now time to insert the logic board into the oven. As can be seen in the picture below the temperature dropped to 163°C. It took around 6 minutes for the oven to regain a temperature of 190°C, hence I decided to go for 7:40 minutes (7 minutes, 40 seconds) instead of the originally planned 7:30.


When 7:40 minutes had passed I took the logic board out of the oven and let it cool down in room temperature for around 4 minutes after which I lost patience and put it in the fridge for some time (around 10 minutes).
Putting it all back together
As the first step of the reassembly, I removed the old thermal paste from the processors as can be seen below:

Thereafter I mounted the logic board (without the cooling plate covering the processors) and attached all screws and connectors:

All that was left now was to apply new thermal paste to the processors, mount the cooling plate and put the battery and bottom cover back in place:


Testing the results
I reconnected the power cable, captured the moment—realized how utterly disappointed I would be if it wouldn’t work—and pressed the power on button:

I could hardly believe it, but the laptop started up like nothing ever happened to it!
Updates
(Updated Nov. 13, 2011: After two months the logic board once again died on me, I did however bake it a second time and now it’s up and running again.)
(Update Jan. 12, 2012: Having just baked it a third time, it is now in working order again.)
(Update Mar. 2, 2012: Just successfully baked it for the fourth time.)
(Update Oct. 22, 2014: I’ve been asked a few times on what happened after the fourth time. As you can see in the comment I got it working once more but eventually got fed up and when it happened the fifth time, after a few weeks, I didn’t bother to do it again.)
17 responses to “Resurrecting the MacBook Air”
I did this on my machine and it worked. Baked at 180 for 8 minutes, no thermometer. I made sure to reattach the heatsink with fresh thermal compou .
Well I couldn’t believe it when I did it! Yeah it worked !
In 180°C for about 7:30 min ! Thank you! I have the very same model with you! mid 2009 and it is very very hot ! I must find a way to cool it to enjoy it because for about 6 months it was dead. Any recommendations ?
Actually there is a sience behind this, the macbook air’s fine soldering become dumb over time and kinda stressed, when cook the logic board, the soldering comes right on it’s place. I’m having the exact problem but i don’t have an owen with termostat or thermometer, i will use a hairdrier first then a hot air gun (for melting plastic and such) I will return with the results.
Alexandru T – don’t try the hot air gun – I did that once with a MB G4 which had a graphic card issue and destroyed it in the process. The oven provides even heat distribution. If you have no thermostat or thermometer, start with a lower temp setting a n shorter baking time. It took me 3 times to get it right. It has now been working fine for nearly 10 months.
What “refined recipe” did you end up with (time and temp.)?
Had a freeze issue again: the MBR (now fondly called MacBakeAir) boots, re-opens a previously opened window and freezes up. I was prepared for this scenario, though it had been nearly/over a year since last bake up.
Last setting was 190 centigrade for 9 minutes.
In all fairness I do not have a baking-stick-it-in your-roast pot thermometer, and my thermostat in the oven is analogue not digital so the exact temperature is a guess.
This time, and mind it it had been in the oven 4 times before, the setting was 200 centigrade and 10 minutes.
In the future, I might go for a longer time, but not a higher temperature. I have seen a graphics card processor slide off the board in my old MB G4.
After re-assembling, the freeze up went away and my BakeBook is working fine.
I do, however; pay more attention to fan speeds, and try and keep it reasonably cool.
I never got the kernel panic thing. In the morning I still worked on it, in the afternoon I was greeted by a black screen, rebooted, rebooted again, flushed the SMC: nothing.
So I disassembled all the peripherals, looking for faulty hardware – still nothing. Diagnose: logicboard failure.
With two hinge replacements, I was somewhat prepared that one day my MBR (late 2008) was going to die. But you are never quite ready – even with three other Macs around the house. So I baked it at 180°C for 8 minutes – mind it, I only had the oven thermostat to go by, not a thermometer, so it wasn’t exact science. I am typing these words on my resurrected MBR and wondering what to call it now: iToast, iBake, MacBake Air.
🙂
How long have the repairs lasted for you who have tried this?
It lasted one month and then I had to repeat the process. That was about 3 weeks ago and it is still going strong. Hopefully it will last longer than the first time!
Hi,
Just to let the world know that I saved my Macbook Air (2009) using your blog. Symptoms of my MBA was that it gave three beeps when starting up leaving me with a black screen. Three beeps means RAM memory was not good anymore.
After baking my logic board as you instructed my MBA started up nicely again.
Regards,
Huub
Was about to order a new logic board when I stumbled across this post. Worked like a charm on my wife’s Macbook Air (mid 2009). Hopefully it will last more than a few hours, days, weeks or months 🙂
Thanks for posting!
Glad to hear, thanks for posting!
LOL. I’d like to know if a microwave oven will do the trick too
Well, it did! 🙂 The fourth time it didn’t last as long though, if I recall correctly it worked for three or four weeks. Then I got fed up, put it in a drawer and went to the store.
Does it still work since the last (fourth) time you baked the logic board? 😀
What a fucked up way of fixing a broken laptop… awesome stuff! 🙂